Professional Photography & Drone Services in WV
UA-Visions
Welcome to UA-Visions: Your Premier Choice for Professional Drone and Photography Services in West Virginia
At UA-Visions, we specialize in bringing a unique perspective to every project, combining the art of traditional photography with the innovation of drone technology. Based in Charleston, WV, we serve clients throughout the state and neighboring regions, offering a wide range of services tailored to meet your specific needs.
Looking to stand out?
Expert Aerial Imagery and Media Solutions for Diverse Applications
Our team of certified drone operators excels in aerial photography and videography, providing stunning visuals for various applications. From real estate showcasing to construction progression tracking, our drones capture high-quality images and videos that enhance your project’s presentation. Our aerial drone inspections, including thermal imaging, offer invaluable insights for industries like agriculture, infrastructure, and more.
Portrait Photography Services
Every Snapshot Captures a Moment
Capturing the essence of your personality or event with our professional portrait photography services. Tailored to your unique needs, we offer individual, family, corporate, and lifestyle portraits that truly reflect your individuality and style.
Drone Mapping and 3D Modeling
Precision Drone Mapping and 3D Modeling
Leverage our advanced drone mapping and 3D modeling services for detailed and accurate visual data. Ideal for construction, real estate, and more, we provide the insights you need to make informed decisions.
Event Photography and Videography
Telling Your Story Through Stunning Visuals
Preserve the magic of your special day with our event photography and videography services. From weddings to corporate events, we offer aerial videos & photos that add a unique perspective to your event memories.
Marketing and Advertising Content Creation
Tailored to Grow and Enhance Your Brand
Harness the power of video to convey your brand’s message compellingly. Our custom drone videos are crafted to resonate with your audience, driving engagement and fostering conversions through quality video content.
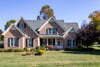
Real Estate Services
Residential and Commercial Real Estate Services
Showcase your properties in their best light with our aerial photography for real estate. Offering both aerial and ground-level photography, 3D virtual tours, and immersive video tours, we create visuals that attract potential buyers and accelerate sales.
Construction Progress Monitoring
Aerial Insights for Project Tracking
Keep track of your construction projects with our services, offering regular aerial drone inspections to monitor progress, ensure safety compliance, and address issues promptly.
Aerial Drone Inspection Services
Aerial Inspection Services
For those hard to reach locationsOur drone inspection services offer a safe and efficient way to inspect hard-to-reach areas. From infrastructure inspections to roof check-ups, we provide the visual data you need to make informed decisions.
Shop from Our Exclusive Prints Collection
Shop Our Hi-Res Print Collections
We’ve been working on building the print shop and started adding some of our best prints that are available for purchase.
Tailored Solutions for Your Unique Needs
Every client is unique, and so are our solutions. At UA-Visions, we understand the importance of customized service. That’s why we work closely with you to understand your vision and deliver results that exceed expectations. Our commitment to quality and customer satisfaction has made us a trusted partner in West Virginia’s photography and drone service industry.
This commitment is reflected in our comprehensive gear list, featuring cutting-edge drones, mirrorless cameras, action cameras, and essential accessories. From unparalleled aerial photography captured by DJI Mavic drones to stunning visuals from Sony and Canon mirrorless cameras, our equipment empowers us to bring your vision to life.
new product | promoting a sale | increasing brand awareness
Promotional Marketing and Event Coverage in West Virginia
About Us
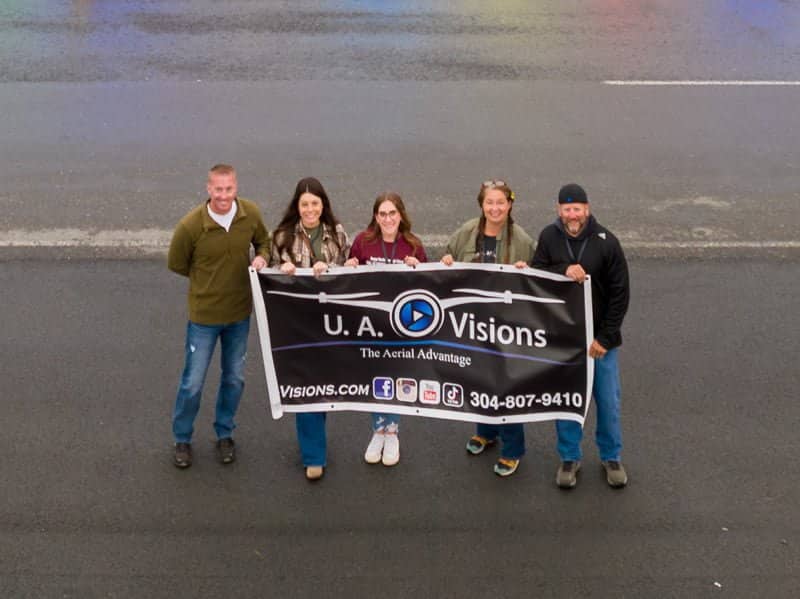
Meet The Team
Discover how UA-Visions was born during a family vacation at the Outer Banks in 2021. Co-founders Ryan and Jason transformed their passion for photography and drone technology into a thriving business. Today, UA-Visions stands as a symbol of commitment to excellence providing professional drone services and photography in Charleston, WV. We continuously expand our skills and services to cater to the diverse needs of our clients. Learn more about our journey and values on our About Page.
Testimonials
What Customers Say About Our Professional Photography & Drone Services in WV
Explore how our dedication to excellence in photography, videography, and innovative drone services has turned our clients’ visions into compelling visual stories. Your project could be our next masterpiece.
Excellent Service
Outstanding Photographers
I highly recommend this company for any drone photo needs you guys might have in the area, they have been the best drone photographers I have ever worked with.
James Saad

Awesome Photos & Video
Definitely Recommended
These guys are great! My husband and I are planning on selling our house soon and I wanted some aerial pictures and video of my house. Not only did they get awesome pictures and videos, they put it all together into a short movie that I can share.I definitely recommend theses guys!!!
Jessica Andrews
Get in touch
Let’s Get Connected
Have questions, comments, or concerns? We’re here to help! Please fill out our contact form, and let’s start the conversation to address all your needs.